Attention friends!
Be Lured has moved! All new posts will no longer end up here, so please click the link below to move to the new location.
http://be-lured.com
All old posts have been imported to the new website! Yay! However, the old posts will still be here also. And all new posts will be at http://be-lured.com.
See you there!
<3 Kara
20 November, 2012
18 November, 2012
Sunday Surprise: Baby Theavy Sketch
Good afternoon y'all!
My husband and I are on our reading date again at Local Coffee, so I figured I should do a quick post while I have the chance!
Today's Sunday Surprise will feature a sketch I did while in drawing class back at Pacific Lutheran University. In that class we had a sketch book that we had to draw in with pen everyday; each page should look like we spent at least 20 minutes on it. The point was to keep your drawing skills flowing and by using pen, you have to be intentional about every stroke. If you messed up, you would just have to work with it.
This one is a sketch of my cousin Soktheavy. She's a bit older now, but this was her in 2010!

What do you think about this exercise of drawing in ink? It sure does have a risk element in it, but it forces you to commit to every stroke. I hope you like this sketch for Sunday Surprise!
Have a swell Sunday, and see you later!
<3 Kara
13 November, 2012
Tutorial Tuesday: Making a Draw-string Baggie!
 Good evening everyone!
Today' tutorial is a brief walk through of how to make a draw-string baggie! I just learned it in my sewing class today (it's the 2nd class, so I'm not very advanced). It's super cute and easy to make, even if you don't have a sewing machine.
I didn't feel comfortable recording video during class, so I don't have any video footage to show you. So I will just have to talk you through what we did, with the help of some pictures.
On the left is the finished product. You will need a rectangle piece of fabric (long side twice the length of the short side, so a 1:2 ratio), solid color or patterned, it's really up to you. In class we were provided with white fabric and choice of ribbon (I chose green of course!).
If you use a patterned piece of fabric then you won't have to sew decorative stitches across like mine. For white or solid color fabric, and if you have a sewing machine with a variety of stitches, definitely sew some decorative stitches on.
 With rectangle piece of fabric, draw a line 3.5 inches from the top of the short side. For horizontal stitching, we marked 3 more lines, below that line, each 1.5 inches down. The markings were made with markers that could easily be wiped off with a damp cloth. There are other markers that fade over time.Then sew the decorative stitches along those lines. You can see some of my decorative stitches on the left.
From this point, you can leave your edges raw, or you can sew some zigzag stitching along the edges to keep them from fraying. I sewed zigzags along all 4 sides of my rectangle piece.
Then fold your rectangle up in half, wrong side out. Sew the two sides down with a straight stitch, leaving the top open.
 Next, still with the wrong side out, fold the top opening down to meet the 3.5" line you drew (and/or sewed a decorative stitch). Pin and sew along that edge, then sew another round half an inch away from that towards the opening. This will create the path for your ribbon (observe image on the right).
Turn your bag right side out now, and observe the sides where the stitching is. Between the two lines you made earlier, rip that bit of seam on each side using a seam ripper. This will create one opening on each side for your to slide your ribbon through.
 Cut two pieces of ribbon of the same length, and the length should be about 5-6 inches longer than the width of your baggie. If you don't have one of those special sewing gadgets to snake the ribbon through the hole, you can use either a bobby pin (tie the ribbon on the folded part of the pin and use the other end to snake it through) or a long safety pin (pin down one end, close the pin and snake it through).
 For the first piece of ribbon, snake it in and out one end, so you make one full circle and come out the same place you came in (observe image on left). Then tie a knot to keep it from slipping out. Next, do the same for the second piece of ribbon but enter and exit from the other hole you created.
That's it! Your baggie is done! If you made it small,it can be a cute little coin bag, travel make-up bag or anything else you can think of. If you make it bigger, there are even more possibilities on the uses!

If you decide to make one, please do share! Until next time!
<3 Kara
12 November, 2012
Sunday Surprise: Making Sundaes!`
Happy Veterans day everyone!
I married a veteran, have a couple in my family and know plenty of them personally, so I'd like to say thank you to all our veterans and troops for working to keep us safe!
On another note, I missed Sunday Surprise yesterday. My computer has not been very nice to me, so I haven't been able to do much. But today I was able to edit this video that was meant for yesterday. So, enjoy your Sundae Surprise!
<3 Kara
09 November, 2012
Factual Friday: Art Trivia!
Good evening everyone!
I hope your weekend is off to a good start! Mine is a bit of both, I suppose. My husband and I saw Wreck It Ralph today and it was amazing. I highly recommend it, whether or not you are a kid. So fun! So I'd say that was a good start. But my computer has been acting up all week and tonight is no exception. Bummer. I try to do the best I can with it, but I hope I can get it fixed soon. The silver lining for this is that it'll be a weekend of projects and reading, since my computer isn't too much of a distraction (by computer I mean Facebook and League of Legends).
So anyway! Let's get to the point shall we? For Factual Friday, I have decided to share with you all some art trivia via funtrivia.com. Below is a sample from that website (verbatim). For more, visit funtrivia.com and expand your mind!
 I hope you learned one or two things for this. Who knows when art facts will come in handy? The holidays are coming up, so there will be plenty of dinners in the name of Thanksgiving and Christmas, and Kwanza, and Hanuka, and so on for you to use some of this information! Perhaps you would like to share this with people, and hit that like button or share the link.
Have fun and stay creative.
<3 Kara
I hope your weekend is off to a good start! Mine is a bit of both, I suppose. My husband and I saw Wreck It Ralph today and it was amazing. I highly recommend it, whether or not you are a kid. So fun! So I'd say that was a good start. But my computer has been acting up all week and tonight is no exception. Bummer. I try to do the best I can with it, but I hope I can get it fixed soon. The silver lining for this is that it'll be a weekend of projects and reading, since my computer isn't too much of a distraction (by computer I mean Facebook and League of Legends).
So anyway! Let's get to the point shall we? For Factual Friday, I have decided to share with you all some art trivia via funtrivia.com. Below is a sample from that website (verbatim). For more, visit funtrivia.com and expand your mind!

Have fun and stay creative.
<3 Kara
06 November, 2012
Tutorial Tuesday: Vote!
Good evening everyone and happy Election Day!
 I had a tutorial planned for today but my computer is under the weather and is not working :( that with my busy schedule today means there's not art tutorial for today, and I apologize.
So now that you guys understand why there is not true Tutorial Tuesday on Be Lured today, I shall do a tutorial of another nature. This tutorial is to honor Election Day. It's simple, and this is what you have to do: vote. I hope that you all exercised your right to vote today if you are eligible, as I have. Those who haven't voted, and are eligible to vote, there is very little room for them to be upset if the results did not turn out the way they wanted.
The image on the left is from Khmerican, an "online platform that encourages public engagement, discussion and connection of Khmer communities across the US and abroad" (Khmerican.com, 2012). We were encouraged to show our patriotism for Khmer-America in voting by sharing this image. I am so happy to see such engagement from our Khmer community and so I am displaying this logo on my site proudly.
Check out all these Khmericans who are proudly saying "I'm Khmer-American and I voted!" by clicking here http://vote2012.khmer-i-can.com.
So about my computer (not to change the topic abruptly or anything) I think I have a virus or something. I keep getting a booting errors, as in my computer cannot start, every other time I try to start my computer. And when I do manage to start, I am not able to run any programs, nor can I view documents. I can, fortunately, copy and paste files! So I have been backing up my documents, images and videos all day. I actually had to go purchase a new external hard drive because I didn't have sufficient storage space. Ooops! So hopefully I finish backing everything up tonight so that tomorrow I can try to figure out what's wrong and fix it without chances of destroying my files, mainly my images! I take so many photographs to document our lives, and a couple photo shoots for other people, so losing that would be quite devastating, since that has happened before to both my and my husband. But as of now, things are on track.
Take care everyone!
<3 Kara
04 November, 2012
Sunday Surprise: Speed painting of Ruby
Good evening y'all!
It's Sunday night, so I have a bit of time to do a quick Sunday Surprise. However, this isn't that big of a surprise to some of you because I uploaded this video a couple days ago and couldn't resist sharing before today's post! hehe
But anyway, the surprise is a speed painting video of me painting Ruby from Once Upon a Time. I did this in preparation for a Tutorial Tuesday. Enjoy!
The song in this video is called "Bind Me to the Brinks" by Sublunary, who is a friend of mine. Please show him some love and check out his site: http://sublunary.bandcamp.com. The song is available on his website for a "you name it" price, and I encourage you to at least give it a chance :)
Share and like if you please! Until next time,
<3 Kara
01 November, 2012
Factual Friday: Be Healthy!
Good morning Lured Ones,
I hope your week went well and that your weekend is off to a great start! I'd say my week has been pretty dang good, with a lot of fitness, great discussions, painting time and of course Halloween. With things going so well, I've been in such a good mood that I can see it in my work. I prepare for a painting faster, get through a painting with more enthusiasm, and I don't stress out about the little things as much. This kind of positive outlook has encouraged me to write quickly on the importance of good physical, mental and emotional health in painting (and anything else really).
In addition to this, I'd like to share a contemporary artist that I recently found. His oil paintings are fantastic and I'm loving his color composition as well as style. Check it out!

Although P90X is rough at times, my body and my art work is thanking me. I have so much more energy in my days to be more productive in everything. And today I read an article from a contemporary artist that I admire on the importance of a healthy lifestyle. He mentioned that letting his fitness slide had affected his back, which eventually affected his work because he couldn't sit all day painting without pain in the lumbar region. So after getting fit again, he saw the change. You can read more about it by clicking here. I encourage you to visit his site (http://dgoilpaintingtechniques.com) and also look at his work. He is a fantastic artist. And he is also a PLU alumnus. What a small world right?
In addition to my physical health, I feel that emotionally and mentally I am in a good place. This is not to say that I wasn't before, it's just that I feel so enthused and excited for my days recently. A friend introduced me to the book "Finding the Hero in Your Husband" by Julianna Slattery and I've been reading it with an open mind and open heart. It has opened my eyes to many things and has given me kind of a refreshed outlook on how to build my home even stronger. That tid-bit and discussing it with my friend in more detail today, a sort of book discussion on a few chapters, has gotten me so motivated to be better.
Now I know that this isn't the most novel thing in the world, but it is important. So there it is, my thought for this week's Factual Friday.
See you on Sunday Surprise (I think you're gonna like the surprise).
<3 Kara
I hope your week went well and that your weekend is off to a great start! I'd say my week has been pretty dang good, with a lot of fitness, great discussions, painting time and of course Halloween. With things going so well, I've been in such a good mood that I can see it in my work. I prepare for a painting faster, get through a painting with more enthusiasm, and I don't stress out about the little things as much. This kind of positive outlook has encouraged me to write quickly on the importance of good physical, mental and emotional health in painting (and anything else really).
In addition to this, I'd like to share a contemporary artist that I recently found. His oil paintings are fantastic and I'm loving his color composition as well as style. Check it out!

"Braids" by David Gray, dgoilpaintingtechniques.com
Although P90X is rough at times, my body and my art work is thanking me. I have so much more energy in my days to be more productive in everything. And today I read an article from a contemporary artist that I admire on the importance of a healthy lifestyle. He mentioned that letting his fitness slide had affected his back, which eventually affected his work because he couldn't sit all day painting without pain in the lumbar region. So after getting fit again, he saw the change. You can read more about it by clicking here. I encourage you to visit his site (http://dgoilpaintingtechniques.com) and also look at his work. He is a fantastic artist. And he is also a PLU alumnus. What a small world right?
In addition to my physical health, I feel that emotionally and mentally I am in a good place. This is not to say that I wasn't before, it's just that I feel so enthused and excited for my days recently. A friend introduced me to the book "Finding the Hero in Your Husband" by Julianna Slattery and I've been reading it with an open mind and open heart. It has opened my eyes to many things and has given me kind of a refreshed outlook on how to build my home even stronger. That tid-bit and discussing it with my friend in more detail today, a sort of book discussion on a few chapters, has gotten me so motivated to be better.
Now I know that this isn't the most novel thing in the world, but it is important. So there it is, my thought for this week's Factual Friday.
See you on Sunday Surprise (I think you're gonna like the surprise).
<3 Kara
Awesome Art Related Halloween Costume
Hey everyone!

Just wanted to share with you an awesome Halloween costume that Kelly Eddington (an artist I blogged about previously) did with her husband. It's Picasso's painting "Head of a Woman" by Picasso. Check it out and click here!
<3 Kara

Just wanted to share with you an awesome Halloween costume that Kelly Eddington (an artist I blogged about previously) did with her husband. It's Picasso's painting "Head of a Woman" by Picasso. Check it out and click here!
<3 Kara
30 October, 2012
Tutorial Tuesday: Understanding Color
Good afternoon Lured Ones!
I hope your week is off to a good start and are on your way to happy Halloween tomorrow!
Today I had a tutorial planned and began filming it for you. Then half way through painting it, migraine hits and that was the end of that tutorial for now. I get frequent migraines that sometimes get so bad that I can't do anything but to lay down. So that's what I've been doing. I will post a picture below to give you a sneak-peek into what I had planned for today, however, I won't tell you what I am planning to demonstrate:

I realized that there's no way I can finish a tutorial for you today in time, so I decided to muster up some energy to find a good tutorial to show you all. After a bit of searching, I found a good video discussing color mixing and making a color wheel. It's a video on YouTube by Jerry Yarnell. He does a great job describing how colors interact with each other and also gets into describing color composition for different moods for a painting with examples from his studio.
I am posting a this video (that has no affiliation to me, I just really liked his explanation) in place of my own today, but keep in mind that I will finish this tutorial when I can and still post it for next week's Tutorial Tuesday. So be sure to check back for that! I think you will really like what I have planned.
So with that said, I shall leave you in the good hands of Mr. Yarnell.
<3 Kara
29 October, 2012
Happy Birthday Bob Ross!
Happy Monday everyone!
Google did a doodle today for Bob Ross's birthday and I was so excited to see it. He was had an influence in pushing me to paint, although it wasn't quite apparent at the time. I didn't speak English yet so the only thing I understood from the show was how beautiful colors could transform a blank canvas into a beautiful scene. That with his pleasant and clam demeanor made his show one that I watched frequently after school on PBS.

 A friend of mine from college is also a big fan of Bob Ross and his techniques, so I'm sure he appreciates what Google did.
If you don't know who Bob Ross is, look him up, I highly recommend it. In short he is a contemporary oil painter known for hosting the show "The Joy of Painting" on PBS and from then became an instructor for many, published instructional books and sold a line of art supplies. He always set a very pleasant, calm and happy mood for his show and made tons of "happy little trees".
His techniques consist primarily of the wet-on-wet technique where you build layers of oil paint on each other without waiting a lengthy time for the preceding layer to dry first. The techniques he demonstrated were relatively simple, yet effective in creating beautiful scenery with gorgeous mountains, lakes, trees, rivers and sometimes cute little creatures.
Anyway, I hope that was a good treat to start your Monday. Tell me what you think about Bob Ross and if you've ever seen his show back in the day or even reruns of today :)
Take care!
<3 Kara
"We don't have mistakes here, we just have happy accidents" - Bob Ross
Google did a doodle today for Bob Ross's birthday and I was so excited to see it. He was had an influence in pushing me to paint, although it wasn't quite apparent at the time. I didn't speak English yet so the only thing I understood from the show was how beautiful colors could transform a blank canvas into a beautiful scene. That with his pleasant and clam demeanor made his show one that I watched frequently after school on PBS.
 A friend of mine from college is also a big fan of Bob Ross and his techniques, so I'm sure he appreciates what Google did.
 If you don't know who Bob Ross is, look him up, I highly recommend it. In short he is a contemporary oil painter known for hosting the show "The Joy of Painting" on PBS and from then became an instructor for many, published instructional books and sold a line of art supplies. He always set a very pleasant, calm and happy mood for his show and made tons of "happy little trees".
His techniques consist primarily of the wet-on-wet technique where you build layers of oil paint on each other without waiting a lengthy time for the preceding layer to dry first. The techniques he demonstrated were relatively simple, yet effective in creating beautiful scenery with gorgeous mountains, lakes, trees, rivers and sometimes cute little creatures.
Anyway, I hope that was a good treat to start your Monday. Tell me what you think about Bob Ross and if you've ever seen his show back in the day or even reruns of today :)
Take care!
<3 Kara
28 October, 2012
Sunday Surprise: Dragonfly Mosaic

The day is almost over and I realized I forgot all about Sunday Surprise, and I am so sorry! So here it is, a bit late.
Today I am sharing with you all a mosaic I did a long while ago back in IB art. During that time, I experimented a lot with different mediums, and at one point I did spend a lot of time in the glass room. I learned to cut glass, and put them together, how stained glass is made and how to use tile grout. Although I enjoyed it very much, as I experimented with many more mediums, I drifted away from glass and never came back, not because I didn't want to but it just never happened.
Anyway, this one is made with glass, filled with toned tile grout on thick panel of wood and 1 inch thick. Then I bordered the whole thing with a wooden frame, which I painted a maroon-brown color to compliment the warm sky.
So here is my Dragonfly mosaic. I hope you like it, and happy Sunday Surprise!
<3 Kara
26 October, 2012
Factual Friday: Ruby Liberty Dragonfly by Kelly Eddington
Good morning Lured Ones!
It's Factual Friday again! I hope your week has been bearable, if not good.
My husband and I have started P90X and we are very much in pain. However, it is extremely rewarding to finish a workout that I didn't think I could do since I don't really have muscle at all... just bones. The other day, I was trying to eat a banana after a P90X session in an attempt to not barf. Let me tell you, this is serious business. No joke! So that's my tid-bit of the day. On with Factual Friday!

Today I wanted to share with you an artist I discovered recently. I follow a beauty b/vloger Emily from Beauty Broadcast and saw her sister's amazing work. I've been a fan since. Her name is Kelly Eddington and she creates highly realistic portraits, still lifes, florals, and occasional landscapes using watercolors, which she calls "the most unpredictable, unstable, and unforgiving medium known to man." She always starts with a face, and builds it up in layers as they emerge from the white surface. As this happens, she "falls in love" with every thing about her subject, everything that makes them unique. She loves to paint her subjects in their environment whether it's a room full of books or any of their favorite things. She describes her method and process so beautifully that I recommend you visit her site and read it for yourself! Her site is kellyeddington.com and be sure to read her bio!
Here are some of her works. For more, please click here.


I hope you found Kelly Eddington's work as beautiful as I do! See you for Sunday Surprise...
<3 Kara
It's Factual Friday again! I hope your week has been bearable, if not good.
My husband and I have started P90X and we are very much in pain. However, it is extremely rewarding to finish a workout that I didn't think I could do since I don't really have muscle at all... just bones. The other day, I was trying to eat a banana after a P90X session in an attempt to not barf. Let me tell you, this is serious business. No joke! So that's my tid-bit of the day. On with Factual Friday!

Ruby Liberty Dragonfly by Kelly Eddington, watercolor. Click here for her post on this piece. Can you believe this done in watercolor??
Today I wanted to share with you an artist I discovered recently. I follow a beauty b/vloger Emily from Beauty Broadcast and saw her sister's amazing work. I've been a fan since. Her name is Kelly Eddington and she creates highly realistic portraits, still lifes, florals, and occasional landscapes using watercolors, which she calls "the most unpredictable, unstable, and unforgiving medium known to man." She always starts with a face, and builds it up in layers as they emerge from the white surface. As this happens, she "falls in love" with every thing about her subject, everything that makes them unique. She loves to paint her subjects in their environment whether it's a room full of books or any of their favorite things. She describes her method and process so beautifully that I recommend you visit her site and read it for yourself! Her site is kellyeddington.com and be sure to read her bio!
Here are some of her works. For more, please click here.


I hope you found Kelly Eddington's work as beautiful as I do! See you for Sunday Surprise...
<3 Kara
23 October, 2012
Tutorial Tuesday: Priming the Canvas
Good evening everyone!
 I can't believe Tuesday is almost over. But it is still Tuesday, nonetheless, and that means it's time for another Tutorial Tuesday. I actually was uploading it earlier today in the morning and I got really sick and was in bed all day, so I wasn't able to put up a post until now.
For this Tutorial Tuesday, I am showing you how to prime the canvas as a follow up from the last tutorial. In this one, I am showing how to prime the canvas board we made. You are not limited to the canvas board as you can prime pretty much any surface in preparation for painting. I hope you like it!If you were wondering, music is again by my friend Eric, so be sure to give his Sublunary band page and Facebook page some love.
See you on Factual Friday!
<3 Kara
21 October, 2012
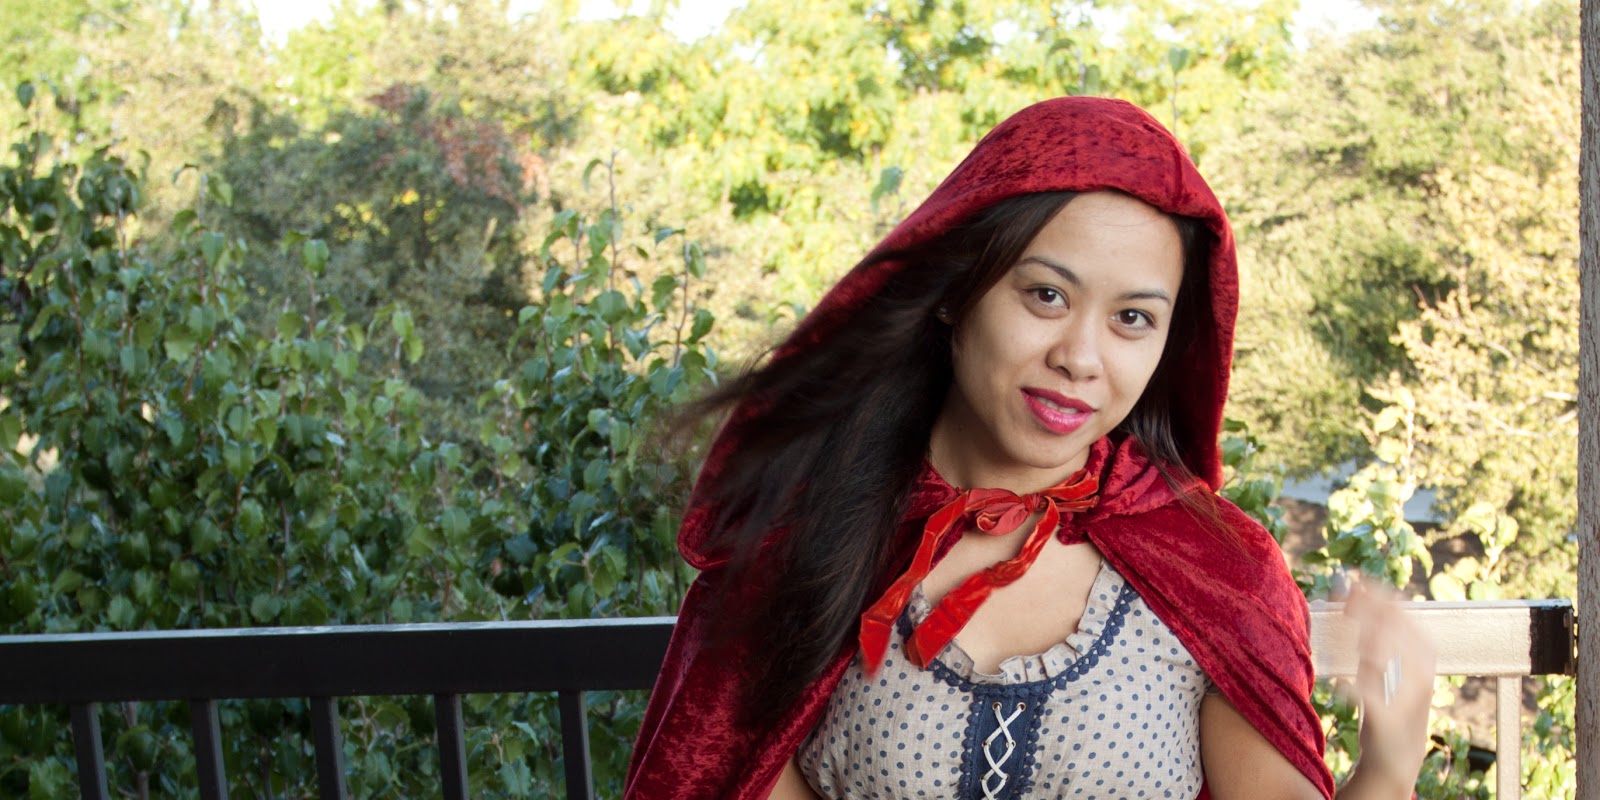
Sunday Surprise: Red Riding Hood Costume!
Happy Sunday afternoon everyone!
I'm sorry that today's Sunday Surprise is coming to you so late, but I have been working vigorously all weekend to finish my red hooded cloak for my costume to show you, and I have just finished this afternoon!

While I was in Seattle, I saw this super cute dress at TJMax that I had to have because it reminded me of Red Riding Hood for some reason. So I decided to buy it and use it for Halloween, but this dress is so cute I've been wearing it casually :)
 After that dress, my quest for an awesome red hooded cloak began. I have a very specific idea of what the cloak should look like. The cloak should be legit, long and with a big over-sized hood. I didn't want the half length cloak made of thin costume material. I wanted this to be semi-heavy, covers all of me if I wanted and flow well, like Red's cloak from Once Upon A Time or Amanda Seyfried's in the 2011 Red Riding Hood film.
 I searched online and there are some good and not so good tutorials out there for cloaks. Most of them weren't what I was looking for specifically. And I looked on Etsy, and the cloak that I wanted went for $200 - no way. So on my search I finally found a site that referred me to the Simplicity pattern #5794 that I bought from Joann's for $1. Finally, a pattern that I liked. I chose to make cloak C (which is the green cloak in the bottom right of the Simplicity image). The body turned out great but the hood just was not what I was looking for. So my quest continued, until I found this video on Youtube on how to make a cloak (click on the link if you'd like to see it). The instructions were kind of hard to follow but the little bit that I did understand, I used that to improvise and voila! Although the tutorial was for a knee-length cloak, the hood was exactly what I was looking for: over-sized and slouchy hood :) So I went for it and it turned out fantastically!


The image on the left is the cloak with the original hood from the pattern. I really disliked it, so I took it off and went for the other hood I found at the youtube tutorial I linked above. The image on the right is the complete cloak with the second hood. Although you can't see the new hood on that image, the image below shows the cloak with the second and final hood.

I had so much fun making this! It was a great first major project from scratch on my new sewing machine. I made so many mistakes on this project but I survived and I am so glad I stuck it out. If you have any specific questions about how I made this cloak, leave a comment and I'll be sure to get back to you! Also, since you know that I will be Red for Halloween, I would love it if you shared what you were thinking for your costume :)
I hope you all had a wonderful weekend. See you on Tutorial Tuesday when I take you through the next step in canvas-making. Take care!
<3 Kara
I'm sorry that today's Sunday Surprise is coming to you so late, but I have been working vigorously all weekend to finish my red hooded cloak for my costume to show you, and I have just finished this afternoon!

While I was in Seattle, I saw this super cute dress at TJMax that I had to have because it reminded me of Red Riding Hood for some reason. So I decided to buy it and use it for Halloween, but this dress is so cute I've been wearing it casually :)

 I searched online and there are some good and not so good tutorials out there for cloaks. Most of them weren't what I was looking for specifically. And I looked on Etsy, and the cloak that I wanted went for $200 - no way. So on my search I finally found a site that referred me to the Simplicity pattern #5794 that I bought from Joann's for $1. Finally, a pattern that I liked. I chose to make cloak C (which is the green cloak in the bottom right of the Simplicity image). The body turned out great but the hood just was not what I was looking for. So my quest continued, until I found this video on Youtube on how to make a cloak (click on the link if you'd like to see it). The instructions were kind of hard to follow but the little bit that I did understand, I used that to improvise and voila! Although the tutorial was for a knee-length cloak, the hood was exactly what I was looking for: over-sized and slouchy hood :) So I went for it and it turned out fantastically!

The image on the left is the cloak with the original hood from the pattern. I really disliked it, so I took it off and went for the other hood I found at the youtube tutorial I linked above. The image on the right is the complete cloak with the second hood. Although you can't see the new hood on that image, the image below shows the cloak with the second and final hood.
I had so much fun making this! It was a great first major project from scratch on my new sewing machine. I made so many mistakes on this project but I survived and I am so glad I stuck it out. If you have any specific questions about how I made this cloak, leave a comment and I'll be sure to get back to you! Also, since you know that I will be Red for Halloween, I would love it if you shared what you were thinking for your costume :)
I hope you all had a wonderful weekend. See you on Tutorial Tuesday when I take you through the next step in canvas-making. Take care!
<3 Kara
19 October, 2012
My First Giclee Print: Girl and Dragon
Hey everyone!

I couldn't wait to share with you all some exciting news! As you know I have ordered my very first giclee print and I finally picked it up today! There were some complications with the printer (as in it broke) so I had to wait an extra week for them to order a new special printer before it was ready. I'm so happy with the results and so I took some pictures for you :)
 Here is me with the unveiling of the amazing print! It's the the first time I've seen it though, since I had to see it at the print shop to confirm, but still, that sounds way more dramatic. In any case, I was still happy to see it again. The owner of the print shop (River City Digital Graphics), Jim commented that he liked the painting and that I did a great job with it :) That was so great to hear, especially since he has been painting for a very long time. He also said that I did a great job with the digital image as it looks as good as if it were scanned (I took a picture with my camera with strategic lighting). That also was amazing to hear; it's always good to get confirmation that you are doing a good job.
Now that I have an archival quality print of this painting, I will be happy to share both with Andi and have him pick which ever one he wants to have. After all, this painting wouldn't have existed without him.
So that was my exciting news for today. That makes two posts in one day! Yowza :) Until next time!
<3 Kara

I couldn't wait to share with you all some exciting news! As you know I have ordered my very first giclee print and I finally picked it up today! There were some complications with the printer (as in it broke) so I had to wait an extra week for them to order a new special printer before it was ready. I'm so happy with the results and so I took some pictures for you :)

Now that I have an archival quality print of this painting, I will be happy to share both with Andi and have him pick which ever one he wants to have. After all, this painting wouldn't have existed without him.
So that was my exciting news for today. That makes two posts in one day! Yowza :) Until next time!
<3 Kara
Factual Friday: Frida Kahlo
Good morning Lured Ones!
Welcome to the first of many Factual Fridays!

While reading through my art history book (History of Art from the Middle Ages to the Renaissance, Impressionism and Modern Art, 2008), the description for Frida Kahlo's ((1907-1954) information caught my eye. Among the insight into the beginnings of why she started painting and what her paintings reflect, there was a quote by Andre Betron that described her art as "like a ribbon tied around a bomb" that I found extremely moving.
Although she had no intention of being an artist, a bus accident that left her severely injured and spent over a year in bed to recover, and in her convalescence she began to paint. At this time, her work consisted mainly of self portraits and still life. At age 22 Kahlo married a famous muralist Diego Rivera who was 20 years her senior. Their artistic temperament, infidelities as well as her poor health and inability to bear children resulted in a stormy marriage with divorces and remarriages. Much of Kahlo's work during this period describes the pain she suffered. Not only that, but also the pain of women in general were dominant features in her paintings, expressed in a surreal way and often vibrant with intensity and passion.
In her artistic career Kahlo produced 143 paintings alone, 55 of which are self-portraits. When asked why she painted so many self-portraits, Kahlo replied "because I am so often alone... because I am the subject I know best."
With that said, two of Kahlo's works are featured on this post. For more, please click here: List of selected works. You can also google "Frida Kahlo" and will also find plenty of information and other works. Enjoy!

<3 Kara
Resources:
Welcome to the first of many Factual Fridays!

Autoretrato en la Frontera entre Mexico y lost Estados, 1993
While reading through my art history book (History of Art from the Middle Ages to the Renaissance, Impressionism and Modern Art, 2008), the description for Frida Kahlo's ((1907-1954) information caught my eye. Among the insight into the beginnings of why she started painting and what her paintings reflect, there was a quote by Andre Betron that described her art as "like a ribbon tied around a bomb" that I found extremely moving.
Although she had no intention of being an artist, a bus accident that left her severely injured and spent over a year in bed to recover, and in her convalescence she began to paint. At this time, her work consisted mainly of self portraits and still life. At age 22 Kahlo married a famous muralist Diego Rivera who was 20 years her senior. Their artistic temperament, infidelities as well as her poor health and inability to bear children resulted in a stormy marriage with divorces and remarriages. Much of Kahlo's work during this period describes the pain she suffered. Not only that, but also the pain of women in general were dominant features in her paintings, expressed in a surreal way and often vibrant with intensity and passion.
In her artistic career Kahlo produced 143 paintings alone, 55 of which are self-portraits. When asked why she painted so many self-portraits, Kahlo replied "because I am so often alone... because I am the subject I know best."
With that said, two of Kahlo's works are featured on this post. For more, please click here: List of selected works. You can also google "Frida Kahlo" and will also find plenty of information and other works. Enjoy!

The Two Fridas, 1939I hope you liked this first Factual Friday, and if you did, don't forget to share it with those who will also find this interesting. See you on Sunday for a Sunday Surprise!
Oil on canvas, 68 x 68 in. (173 x 173 cm), Museo de Arte Moderno, Mexico City
<3 Kara
Resources:
- History of Art from the Middle Ages to Renaissance, Impressionism and Modern Art, 2008 (ISBN: 978-1-84451-329-1)
- http://www.artchive.com/artchive/K/kahlo.html
- http://www.fridakahlo.com/
16 October, 2012
Tutorial Tuesday: How to Make a Canvas Board/Panel
Good afternoon everyone!

Today features the first installment of Tutorial Tuesday! I've decided to do a tutorial on how to make a canvas board. I've stretched canvases before, but have yet to make a canvas board. There was a simple How To in one of the books I owned and thought it would be a fun first tutorial for this series. I also did a bit of research just to see what others are doing out there to make their canvas boards, and adjusted a template of how I would do it.
As you are watching this video, please keep in mind that I am doing this tutorial for the first time with you. I have never done this before, so I will be making mistakes as someone doing something for the first time might. With that said, enjoy! And don't forget to come back for the first Factual Friday on Be Lured on... you guessed it, Friday!
<3 Kara
15 October, 2012
"Sundae" Surprise! ... on Sunday!
Good evening Lured Ones!
 I hope you all had a wonderful weekend!
As you can see, I am implementing a new feature to this blog called Sunday Surprise! This means that every Sunday I will post on something of my choice. Sometimes it will be about a finished piece or project that I am currently working on and sometimes it will be something not related to my works at all. Since it is supposed to be a surprise, I won't elaborate too much on what Sunday Surprises will feature; you will just have to wait and see!
This Sunday, there are two surprises to kick off the start of this series. The first Sunday Surprise is a sundae! This piece on the left is called "Her Sundae Best" by artist Jacqui Faye. Although she paints contemporary portraits she is best known for her figurative works called the Red Shoe Dailies. In these "red shoe stories," anonymous subjects are portrayed from the shoulders, waist, or knees down and always with red shoes to "paint a story often interpreted by viewers who relate to the artwork through anonymity." To learn more about Jacqui Faye, please visit her site at http://jacquifaye.blogspot.com/
But wait! There's more! Moar!!!!! The second surprise this Sunday is that there are more surprises. In addition to Sunday Surprise, there will also be other days scheduled for posts so that the blog gets a consistent flow of content. Are you ready? Drum roll please.... There will be Tutorial Tuesdays, and also Factual Fridays.
For Tutorial Tuesdays I will take pictures or record a video of myself performing a technique or tutorial from a book, magazine or website for you all to see! So that way we are both learning something new together every week. I'm actually really excited about this because not only is it a forcing mechanism for consistent flow of content, but also it's challenging me to learn something new each week. Yay!
Since we have a day dedicated to techniques I thought a day set aside for learning about art would be appropriate. For Factual Fridays (hehe F to the third), it will be less about techniques and more about art facts. Although the day is called Factual Fridays, I will not post solely short random art facts but rather information regarding art in various categories such facts, art history, current events, notable artists, museums and other research.
I am super excited about Tutorial Tuesdays, Factual Fridays and Sunday Surprises! I hope you are too. I can't wait for Tuesday's post. What tutorial shall I do, I wonder? You'll have to check back and see! Until next time,
<3 Kara
I hope you all had a wonderful weekend!As you can see, I am implementing a new feature to this blog called Sunday Surprise! This means that every Sunday I will post on something of my choice. Sometimes it will be about a finished piece or project that I am currently working on and sometimes it will be something not related to my works at all. Since it is supposed to be a surprise, I won't elaborate too much on what Sunday Surprises will feature; you will just have to wait and see!
This Sunday, there are two surprises to kick off the start of this series. The first Sunday Surprise is a sundae! This piece on the left is called "Her Sundae Best" by artist Jacqui Faye. Although she paints contemporary portraits she is best known for her figurative works called the Red Shoe Dailies. In these "red shoe stories," anonymous subjects are portrayed from the shoulders, waist, or knees down and always with red shoes to "paint a story often interpreted by viewers who relate to the artwork through anonymity." To learn more about Jacqui Faye, please visit her site at http://jacquifaye.blogspot.com/
But wait! There's more! Moar!!!!! The second surprise this Sunday is that there are more surprises. In addition to Sunday Surprise, there will also be other days scheduled for posts so that the blog gets a consistent flow of content. Are you ready? Drum roll please.... There will be Tutorial Tuesdays, and also Factual Fridays.
For Tutorial Tuesdays I will take pictures or record a video of myself performing a technique or tutorial from a book, magazine or website for you all to see! So that way we are both learning something new together every week. I'm actually really excited about this because not only is it a forcing mechanism for consistent flow of content, but also it's challenging me to learn something new each week. Yay!
Since we have a day dedicated to techniques I thought a day set aside for learning about art would be appropriate. For Factual Fridays (hehe F to the third), it will be less about techniques and more about art facts. Although the day is called Factual Fridays, I will not post solely short random art facts but rather information regarding art in various categories such facts, art history, current events, notable artists, museums and other research.
I am super excited about Tutorial Tuesdays, Factual Fridays and Sunday Surprises! I hope you are too. I can't wait for Tuesday's post. What tutorial shall I do, I wonder? You'll have to check back and see! Until next time,
<3 Kara
08 October, 2012
DIY Lace Trimmed Shorts
Good evening y'all!
While visiting Seattle last month, my best friend Elyse and I worked on a sewing project and I wanted to show you what we did!

Many people were pinning and re-pinning these cute lace trimmed shorts and I wanted one so bad! The only problem: I didn't have a sewing machine. But I knew that there was one at Elyse's house, and she was more than happy to help me with this project. We had a blast hanging out, talking and doing crafty things. She helped me with the shorts and also she crocheted these super cute headbands that I will blog about it another post! She is so talented, she could probably make good money selling her stuff. Furthermore, she is so generous for letting me use some of her lace from her stash, the sewing machine and also helping me sew it. I was quite incompetent at the sewing machine (something I plan on fixing) so she had to step in :)
So we started by going to Goodwill to find a pair of jeans to cut up. That day I left Goodwill with an awesome pair of boot cut Banana Republic jeans that fit me perfectly all around. They were even hemmed up to the perfect length for me. After going through Elyse's lace collection together, and choosing potential lace pieces, we agreed to meet another day to sew.
The next meeting, I really didn't have the heart to cut up such a perfect pair of denim. The funny thing was that Elyse mentioned on the first trip to Goodwill, "What if you liked these so much you didn't want to cut them up?" So we made a second trip to Goodwill and felt pretty hopeless when I saw a pair of destroyed Hollister jeans hanging on the discard rack. Those also fit me perfectly and I didn't hesitate cutting off the legs because the knees were too destroyed to my liking.What a lucky day!

Step 1: The lace I decided to use is pictured in the top right. Notice the cute piggies embroidered on it? I was so excited when I noticed it way late. Think about it: who puts piggies on lace trim? So cute! Anyway, the bottom right image shows the Hollister denim that I decided to use. We started by marking the line where we wanted to cut on the leg. I chose it to be just above mid-thigh because I am not a big fan of short-shorts.
Step 2: We turned the shorts inside out and sewed up the hem about half an inch. Elyse started the hem and I tried to finish. The key word here is "try" because I failed miserably. I couldn't keep the hemline straight, so Elyse took over. Isn't she so kind? She actually ended up sewing the rest of it. She doubled sewed the hem to ensure that it was sturdy since this is denim.

Step 3: The finishing step was to sew on the lace along the inside of the denim. We made sure the lace would overlap on the inner thigh so that the lace would be uninterrupted around the rest of the leg.

The finishing of finishing step is to try on the shorts and see how it looks. And I think it looks pretty cute, don't you? They are so cute I wore these shorts the rest of that day :)
We went to her backyard to take some pictures for this blog. She also let me use her Buddy scooter for the pictures and they turned out great! Thanks Elyse for helping every step of the way. I had such an amazing time with you ^_^
I hope you enjoyed this post about the process of making these shorts. If you have questions about this process or would like to make a pair for yourself, please let me know! I I would love to see what you came up with. Until next time!
<3 Kara
06 October, 2012
Self Portrait on a Lily Pad, 2007
Good day Lured Ones!
Today I want to give some insight into a portrait I did for my high school IB art class in 2007. I showed an image in a previous post about my visit to my old high school, but I did not explain. So here goes!

Around this
time I was learning the process of canvas making, and decided to make my
own canvas for the self portrait. The dimension requirement was pretty
large, so I decided to make it about life-sized. As you can see the
small top left image, Ms. Drum was helping me make the canvas, and
bottom left you can see how big the canvas is relative to me (I am 5
foot, 1 inch tall).
On
the right is my finished painting done in acrylics. The whole concept was that I am
sleeping, dreaming on a lily pad on the water. Initially I intended for
the water on the lower part of the canvas to have unclear dark images
that suggested a nightmare. I had trouble sleeping and often had scary
dreams that bore no clear meaning. The fog is suppose to be dense to
give a hazy and dream-like mood.
After
I finished, I spent some time observing the painting and I decided that
I could have done better around the stomach area. The fabric of the
shirt on the stomach is too straight and unreal. Also on the hand, the
ring finger is longer than the middle finger, which is highly inaccurate
>_< I've always had trouble with hands. Also, it was pretty unfortunate that someone took a pen on my painting on the
face area. I had stored it in the supply room, so there was no way to
figure out who. That's not too important because if I wanted to spend
some time fixing it up, I could cover it.
If I were to fix up this painting, what do you think I should change or do differently? Ideas are very much welcome and appreciated :)
Until next time, I hope your weekend is going fantabulously!
<3
05 October, 2012
Visiting my old high school's IB Art class
Good afternoon everyone!
September was a busy month and I wasn't able to post as often as I'd like. However, I was doing things that I could blog about all the while - just didn't have time to sit down and gather photos and edit video clips for uploading. Now that I am back and have some time to myself, I can slowly but surely update you on what I've been up to.
Two weeks ago, I visited my high school teacher and she invited me to return the following day during her IB art class and meet the new kids and see what they were working on. This was such a trip down memory lane because they were working on their self portraits and I was at this point in the class years ago. I was able to speak to some students and learn about some ideas and messages behind their pieces. It was very insightful and I felt so honored that one student shared a particularly personal story behind her piece.
The students were great and so was their work. Here are some works done by students in Ms. Drum's IB art class. I will also share the self portrait I painted at the end. So make sure to scroll all the way down, and enjoy!


 I intended for this post to be about my visit to the class, so I shall give further insight to to this painting in my next post :)
Until next time!
<3 Kara
September was a busy month and I wasn't able to post as often as I'd like. However, I was doing things that I could blog about all the while - just didn't have time to sit down and gather photos and edit video clips for uploading. Now that I am back and have some time to myself, I can slowly but surely update you on what I've been up to.
Two weeks ago, I visited my high school teacher and she invited me to return the following day during her IB art class and meet the new kids and see what they were working on. This was such a trip down memory lane because they were working on their self portraits and I was at this point in the class years ago. I was able to speak to some students and learn about some ideas and messages behind their pieces. It was very insightful and I felt so honored that one student shared a particularly personal story behind her piece.
The students were great and so was their work. Here are some works done by students in Ms. Drum's IB art class. I will also share the self portrait I painted at the end. So make sure to scroll all the way down, and enjoy!
Now here's what I did 5 years ago when I was at this point in the class:
Until next time!
<3 Kara
18 September, 2012
Linoleum Block Printing!
Good afternoon everyone!
It's been a busy and physically demanding day for me as I have been moving furniture around.... by myself ^__________^
After I married and moved out, my sister now has my room and has been in it for the past year-ish. Although it is her room now, all my stuff is there. SO! I figured since I have time, and back in town, I ought to clear out my stuff and make space for my sister. I'm suppose to wait for my husband to help me move the heavy stuff, but I got too excited and decided to start alone. I know, bad idea. I will most likely be sore tomorrow. I moved everything, except the bed, which is super duper heavy! That's a 2+ person job and I shall not break my back trying to move it.


 On another note, I went to my first football game on Sunday and it was AMAZING! It was definitely a good game to attend, since the Seahawks beat the Cowboys :) We spent the morning coloring our hair and painting our faces. When we were looking for parking, we drove through the area where people have been tailgating all day and got high-fives and handshakes all around because we were decked out in Seahawks gear and super colorful. What a great time! Although, we were surrounded by Cowboys fans and they were good sports-- except for the lady right next to me; she was screaming bloody murder even when it wasn't the right time, and other Cowboys fans even turned around wondering what was going on. Crazy! When the Seahawks scored the 2nd touchdown, I was scared that she would punch me in the face @_@ I am happy she didn't.

 So, on with the star of today's post! I wanted to share with you all some block prints I did a while back. All of these prints are linoleum block printing, with the exception of "Tennis" (left). When I made "Tennis" there were no more linoleum left in the class, so what I did was I took two pieces of mat board paper, glued them together and then carved on that. I think I cut myself doing that because it was really hard since I was carving on cardboard paper. After I finished carving, I covered it all in this layer of something that I can't remember the name of (this was 2006 so it's been a while). It was to make it water proof for when I washed the plate. This was my first print, and it was of my favorite sport, so I was pretty excited. I think I included 12 or 13 in this series.


The following summer (it should be summer of 2006) I made another print called "Ballerina" (above left image, top left). It was for one of my best friend's birthday (I think it was her 17th or 18th birthday). This time I used actual linoleum block. I think I included 6 in the series.
The year after (2007), for IB art year 2, I made another print using linoleum. This one was called "Let's Dance" (Above center is the plate and above right is image of a print). The cool thing about this was that I printed on wood paper. I experimented with other surfaces but my favorite was this light wood paper. I remember that it had a specific name, but once again, I've forgotten it.
I hope you enjoyed learning about my experiments with linoleum block printing! Until next time,
<3 Kara
It's been a busy and physically demanding day for me as I have been moving furniture around.... by myself ^__________^
After I married and moved out, my sister now has my room and has been in it for the past year-ish. Although it is her room now, all my stuff is there. SO! I figured since I have time, and back in town, I ought to clear out my stuff and make space for my sister. I'm suppose to wait for my husband to help me move the heavy stuff, but I got too excited and decided to start alone. I know, bad idea. I will most likely be sore tomorrow. I moved everything, except the bed, which is super duper heavy! That's a 2+ person job and I shall not break my back trying to move it.


 On another note, I went to my first football game on Sunday and it was AMAZING! It was definitely a good game to attend, since the Seahawks beat the Cowboys :) We spent the morning coloring our hair and painting our faces. When we were looking for parking, we drove through the area where people have been tailgating all day and got high-fives and handshakes all around because we were decked out in Seahawks gear and super colorful. What a great time! Although, we were surrounded by Cowboys fans and they were good sports-- except for the lady right next to me; she was screaming bloody murder even when it wasn't the right time, and other Cowboys fans even turned around wondering what was going on. Crazy! When the Seahawks scored the 2nd touchdown, I was scared that she would punch me in the face @_@ I am happy she didn't.


The following summer (it should be summer of 2006) I made another print called "Ballerina" (above left image, top left). It was for one of my best friend's birthday (I think it was her 17th or 18th birthday). This time I used actual linoleum block. I think I included 6 in the series.
The year after (2007), for IB art year 2, I made another print using linoleum. This one was called "Let's Dance" (Above center is the plate and above right is image of a print). The cool thing about this was that I printed on wood paper. I experimented with other surfaces but my favorite was this light wood paper. I remember that it had a specific name, but once again, I've forgotten it.
I hope you enjoyed learning about my experiments with linoleum block printing! Until next time,
<3 Kara
Subscribe to:
Posts (Atom)